From family gatherings to travel adventures, these visual snippets hold immense sentimental value. However, with the risk of device loss or data corruption always looming, it is essential to have a reliable backup solution.
Fortunately, Apple’s iCloud offers a seamless and efficient way to safeguard your media files, eliminating the need for any third-party installations.
In this article, we’ll guide you through the step-by-step process on how to back up photos and videos to iCloud on your iPhone.
Also Read: How To Extract RAR Files On iPhone Without Installation
How To Back Up Photos & Videos To iCloud On iPhone
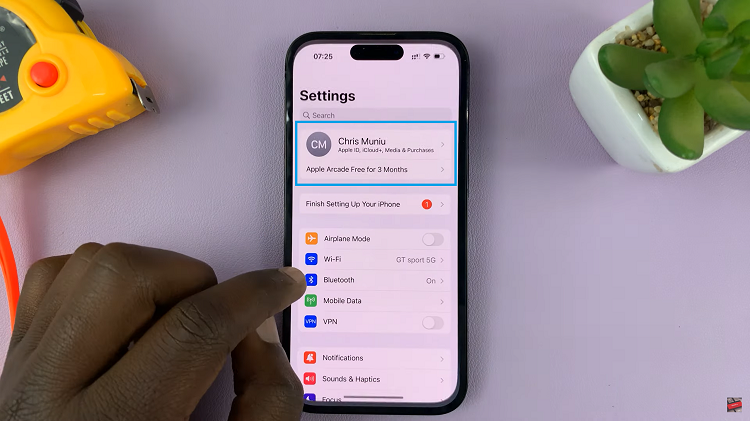
First, open the “Settings” app on your iPhone’s home screen. Next, tap on your Apple ID, which is located at the top of the Settings menu.

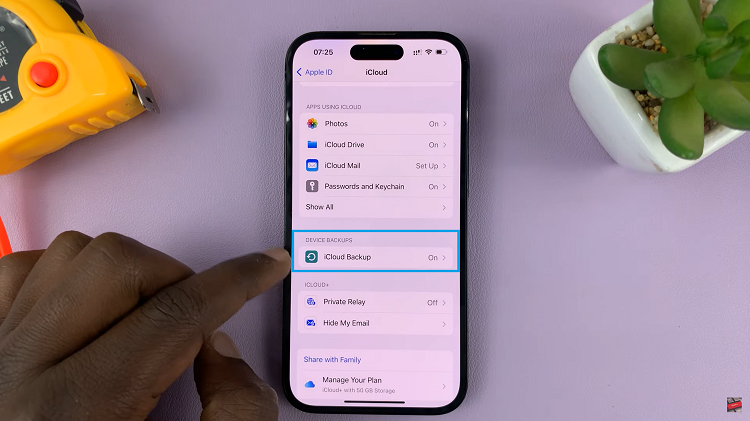
In your Apple ID settings, scroll through the available options and tap on the “iCloud” option. Once inside the iCloud settings, scroll further down until you come across the option labeled “iCloud Backup.”

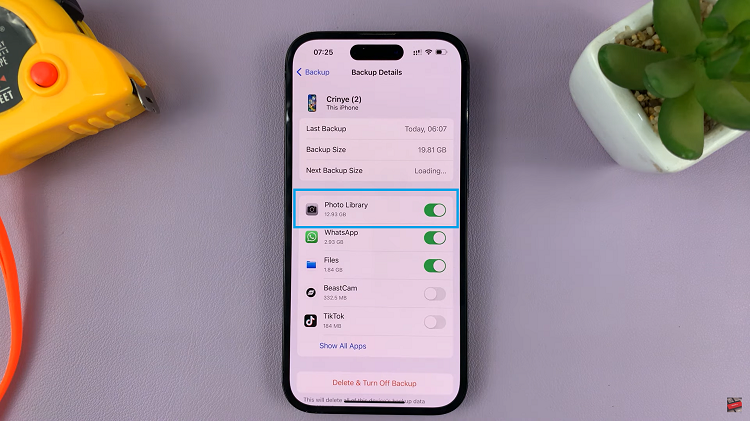
Now, scroll down to see the list of devices linked to your iCloud account. Choose the desired device that contains the photos and videos you want to preserve. A new page will open, displaying a comprehensive list of all the apps authorized to back up data to iCloud.
Here you can find and enable the backup for your “Photo Library.” Locate the toggle switch next to it, and if it’s turned off, simply tap on it to activate the backup feature.

When successfully enabled, the toggle should turn a vibrant green color. This indicates that your photos and videos will now be safely backed up to iCloud.
